Crispy Baked Chicken Wings Recipe | Better Than Fried
Crispy baked chicken wings are the ultimate crowd-pleasing appetizer that delivers all the crunch and flavor of deep-fried wings without the mess, oil, or guilt. These golden, crackling-crisp wings emerge from the oven with skin so crunchy it shatters on first bite, while the meat inside stays juicy and tender. Whether you're hosting a game day party, feeding hungry friends, or just craving wings, this foolproof baking method produces restaurant-quality results every single time - no deep fryer required.
What makes baked wings so appealing? They're significantly healthier than traditional fried wings, using minimal oil while still achieving that coveted crispy skin. There's no splattering hot oil to deal with, no lingering fried food smell in your house, and cleanup is a breeze compared to deep frying. Plus, you can make large batches at once by using multiple baking sheets - perfect for parties where fried wings would require endless batches.
The secret to ultra-crispy baked wings lies in proper technique: drying the wings thoroughly, using baking powder (not baking soda!), cooking at high heat, and using a wire rack so air circulates on all sides. These simple steps transform ordinary chicken wings into crispy, addictive perfection. Then you can toss them in any sauce you love - classic Buffalo, sweet and tangy BBQ, sticky garlic Parmesan, or spicy Asian-inspired flavors.
This foolproof recipe delivers the crispiest skin you've ever achieved in an oven, with four restaurant-quality sauce variations that will make you never want takeout wings again. You'll learn the science behind crispy skin, proper wing preparation, timing and temperature secrets, and how to keep wings crispy even after saucing. Let's make the best baked chicken wings you've ever tasted!
Prep Time: 10 minutes (plus 1 hour drying time)
Cook Time: 45-50 minutes
Total Time: 2 hours
Serves: 4-6 (about 20 wings)
Difficulty: Easy
Cuisine: American
Party-Perfect: Great for game day and entertaining
Healthier Than Fried: Less oil, same crunch
Freezer-Friendly: Yes
Ingredients
For the Crispy Baked Wings:
2 pounds chicken wings (drumettes and flats), or whole wings separated
1 tablespoon baking powder (NOT baking soda - important!)
1 teaspoon salt
1/2 teaspoon black pepper
1/2 teaspoon garlic powder
1/2 teaspoon paprika
Cooking spray or olive oil spray
For Classic Buffalo Sauce:
1/2 cup Frank's RedHot sauce (or your favorite hot sauce)
4 tablespoons unsalted butter, melted
1 tablespoon white vinegar
1/4 teaspoon Worcestershire sauce
1/4 teaspoon garlic powder
Pinch of cayenne pepper (optional, for extra heat)
For BBQ Sauce:
1 cup BBQ sauce (your favorite brand)
2 tablespoons honey
1 tablespoon apple cider vinegar
1/2 teaspoon smoked paprika
For Garlic Parmesan Sauce:
4 tablespoons unsalted butter, melted
4 garlic cloves, minced
1/2 cup grated Parmesan cheese
2 tablespoons fresh parsley, chopped
Salt and pepper to taste
For Asian-Style Sweet Chili Sauce:
1/3 cup sweet chili sauce
2 tablespoons soy sauce
1 tablespoon honey
1 tablespoon rice vinegar
1 teaspoon sesame oil
1 teaspoon fresh ginger, grated
Sesame seeds and green onions for garnish
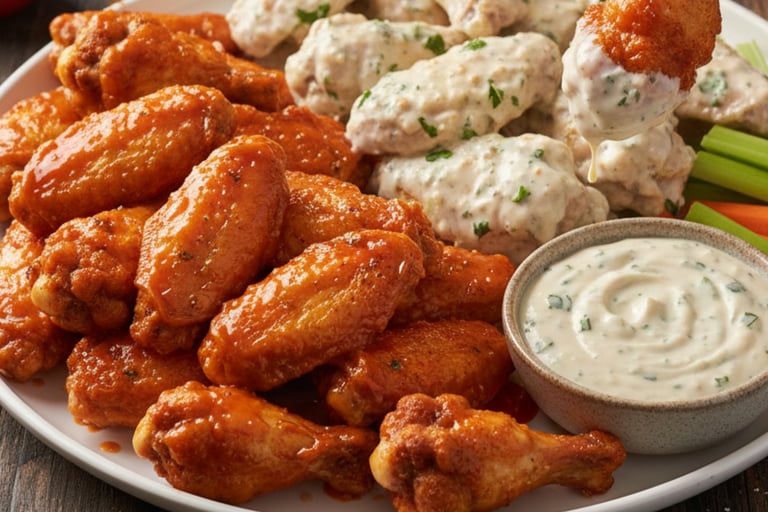
For Serving:
Blue cheese or ranch dressing
Celery and carrot sticks
Extra sauce for dipping
How to Make Crispy Baked Chicken Wings
Instructions:
Step 1: Prepare the Wings (Most Important Step!)
Pat wings completely dry: Remove wings from packaging and place on a large plate lined with paper towels. Pat each wing thoroughly dry on all sides with additional paper towels. This is THE most critical step! Moisture is the enemy of crispy skin. The drier the wings, the crispier they'll become. Don't skip this step or rush through it.
Separate wings if needed: If you bought whole wings, you'll need to separate them into drumettes (the mini drumstick part) and flats (the middle part with two bones). Use a sharp knife to cut through the joints. Discard the wing tips or save them for making chicken stock.
Air-dry in refrigerator (optional but highly recommended): For the CRISPIEST wings possible, arrange the dried wings in a single layer on a wire rack set over a baking sheet. Place uncovered in the refrigerator for 1 hour, or up to 8 hours (overnight is great!). This drying time allows the skin to dehydrate, which creates maximum crispiness when baked. Why this works: The cold, dry air of the refrigerator removes surface moisture better than anything else.
Bring to room temperature: If you refrigerated the wings, remove them 20-30 minutes before cooking to bring them closer to room temperature. This ensures even cooking.
Step 2: Season the Wings
Prepare the seasoning mix: In a large mixing bowl, combine 1 tablespoon baking powder, 1 teaspoon salt, 1/2 teaspoon black pepper, 1/2 teaspoon garlic powder, and 1/2 teaspoon paprika. Whisk together until evenly mixed with no clumps.
Why baking powder? This is the SECRET to crispy skin! Baking powder (not baking soda) raises the pH of the chicken skin, which helps it break down and crisp up faster in the oven. It also helps draw out moisture. Important: Make sure you use baking POWDER, not baking SODA - they're different! Baking soda will make your wings taste bitter.
Toss wings in seasoning: Add the dried wings to the bowl with the seasoning mixture. Toss thoroughly with your hands or tongs, making sure every wing is evenly coated with the baking powder mixture. Massage it into the skin - you want complete coverage.
Let seasoning absorb: Let the seasoned wings sit for 10-15 minutes at room temperature. This allows the baking powder to start working its magic on the skin.
Step 3: Arrange for Baking
Prepare your baking setup: This is crucial for crispy wings! You need a wire rack set inside a rimmed baking sheet. The wire rack allows air to circulate all around the wings, crisping them on all sides. Don't skip the rack! Placing wings directly on a baking sheet will make the bottom soggy. Line the baking sheet with aluminum foil for easier cleanup (optional).
Spray the rack: Lightly spray the wire rack with cooking spray or olive oil spray. This prevents the wings from sticking.
Arrange wings in single layer: Place the wings on the wire rack in a single layer with space between each piece. Don't overcrowd! The wings should not touch each other. Air circulation is key. If making a large batch, use two baking sheets with racks.
Position matters: Arrange the wings so the meatier parts are facing up. This ensures the skin on top gets maximum heat and crisps up beautifully.
Step 4: Bake to Crispy Perfection
Preheat oven: Preheat your oven to 425°F (220°C). Position one oven rack in the upper third of the oven and one in the lower third if using two baking sheets. Why 425°F? This high heat is essential for crisping the skin while cooking the meat through.
First bake: Place the baking sheet(s) in the preheated oven. Bake for 30 minutes without opening the oven door. Don't peek! Opening the door releases heat and steam, which interferes with crisping.
Flip the wings: After 30 minutes, carefully remove the pan from the oven. Using tongs, flip each wing over to the other side. This ensures even crisping on both sides. Return to the oven.
Second bake: Continue baking for another 15-20 minutes until the wings are golden brown, crispy, and cooked through. Total baking time: 45-50 minutes. The wings should be deeply golden with visibly crispy, bubbled skin.
Check for doneness: The wings are done when:
Skin is golden brown and crispy
Internal temperature reaches 165°F on an instant-read thermometer
Juices run clear when pierced
Skin has a shattered, crackling texture when you touch it
Optional final crisp: For EXTRA crispy wings, turn on the broiler and broil for 2-3 minutes, watching carefully to prevent burning. This creates an even crispier, more blistered skin.
Step 5: Make the Sauce (While Wings Bake)
For Buffalo Sauce: 19. In a small saucepan over low heat, melt the butter. Add hot sauce, vinegar, Worcestershire sauce, garlic powder, and cayenne if using. Whisk together and simmer for 2-3 minutes. Remove from heat and keep warm.
For BBQ Sauce: 20. In a small bowl, whisk together BBQ sauce, honey, apple cider vinegar, and smoked paprika. For a thicker sauce, simmer in a saucepan for 5 minutes.
For Garlic Parmesan Sauce: 21. In a skillet, melt butter over medium heat. Add minced garlic and cook for 1-2 minutes until fragrant (don't burn!). Remove from heat and stir in Parmesan cheese and parsley.
For Asian Sweet Chili Sauce: 22. In a small bowl, whisk together sweet chili sauce, soy sauce, honey, rice vinegar, sesame oil, and grated ginger. Mix until smooth.
Step 6: Sauce and Serve
Remove wings from oven: Once perfectly crispy and golden, remove the wings from the oven. Let them rest on the rack for 2-3 minutes. This brief rest allows the skin to set and become even crispier.
Transfer to large bowl: Place the crispy wings in a large mixing bowl. Pro tip: Keep the bowl dry! Any moisture will make the coating soggy.
Toss with sauce: Pour your chosen sauce over the hot wings. Using tongs or two large spoons, toss the wings gently but thoroughly to coat them evenly in sauce. Work quickly so the wings stay hot.
Serve immediately: Transfer sauced wings to a serving platter. Garnish as desired:
Buffalo: Drizzle with extra sauce, serve with blue cheese crumbles
BBQ: Sprinkle with chopped green onions
Garlic Parmesan: Extra Parmesan and fresh parsley
Asian: Sesame seeds and sliced green onions
Serve with dipping sauces and sides: Arrange celery sticks and carrot sticks around the wings. Serve with blue cheese dressing or ranch dressing in small bowls for dipping. Provide extra napkins - wings are messy and that's part of the fun!
Keep extras warm: If not serving immediately, keep wings warm in a 200°F oven for up to 30 minutes. Don't cover them or they'll steam and lose crispiness.
Step 7: Maintain Crispiness
For sauced wings that stay crispy: The secret is to sauce lightly or serve sauce on the side. Heavy saucing will soften the crispy skin. For maximum crispiness with flavor, use only enough sauce to coat the wings lightly, not drown them.
Dry wings option: You can also serve the wings completely unsauced (dry rub style) with sauces on the side for dipping. This keeps them crispiest!
Variation 2: Lemon Pepper Wings
Ingredient Modifications:
Seasoning: 2 tablespoons lemon pepper seasoning
Add: Zest of 2 lemons
Sauce: 3 tablespoons melted butter mixed with 2 tablespoons fresh lemon juice
Instructions:
Season wings with baking powder, salt, and lemon pepper seasoning.
Add lemon zest to the seasoning mix.
Bake as directed until crispy.
Toss in melted butter-lemon juice mixture.
Garnish with extra lemon zest and fresh parsley.
These bright, zesty wings are refreshing and flavorful!
Variation 3: Honey Sriracha Wings (Sweet and Spicy)
Sauce Ingredients:
1/3 cup honey
1/4 cup sriracha sauce
2 tablespoons soy sauce
1 tablespoon lime juice
1 tablespoon butter
Instructions:
Bake wings as directed until crispy.
In a small saucepan, combine honey, sriracha, soy sauce, lime juice, and butter.
Simmer for 3-4 minutes until slightly thickened.
Toss crispy wings in the sauce.
The sweet honey balances the spicy sriracha perfectly!
Garnish with sesame seeds and lime wedges.
Variation 4: Dry Rub Wings (Memphis-Style)
Dry Rub Ingredients:
2 tablespoons brown sugar
1 tablespoon paprika
1 tablespoon chili powder
1 teaspoon garlic powder
1 teaspoon onion powder
1/2 teaspoon cayenne pepper
1 teaspoon salt
1/2 teaspoon black pepper
Instructions:
Mix all dry rub ingredients with the baking powder.
Coat wings thoroughly in the rub mixture.
Bake as directed until crispy and caramelized.
No sauce needed - the rub creates a flavorful crust!
Serve with ranch or blue cheese for dipping.
These stay crispiest since there's no wet sauce.
Variation 5: Teriyaki Wings
Sauce Ingredients:
1/2 cup teriyaki sauce
2 tablespoons honey
1 tablespoon rice vinegar
1 teaspoon sesame oil
1 teaspoon fresh ginger, grated
2 garlic cloves, minced
Instructions:
Bake wings as directed.
In a saucepan, combine all sauce ingredients.
Simmer for 5 minutes until slightly thickened.
Toss wings in teriyaki sauce.
Garnish with sesame seeds and sliced green onions.
These Asian-inspired wings are sweet and savory!
Variation 6: Nashville Hot Chicken Wings
Sauce Ingredients:
4 tablespoons butter, melted
2 tablespoons hot sauce
1 tablespoon cayenne pepper
1 tablespoon brown sugar
1/2 teaspoon paprika
1/2 teaspoon garlic powder
Instructions:
Bake wings as directed until extra crispy.
Mix melted butter with hot sauce, cayenne, brown sugar, paprika, and garlic powder.
Brush sauce on wings generously.
Return to oven for 2-3 minutes to set the sauce.
These SPICY wings are not for the faint of heart!
Serve with pickles and white bread for authentic Nashville style.
Chef's Tips & Pro Secrets:
Dry, dry, dry the wings: This cannot be emphasized enough! Pat wings completely dry, then air-dry in the refrigerator for at least 1 hour. This is the #1 secret to crispy skin.
Baking powder, NOT baking soda: Use aluminum-free baking powder. The baking powder raises pH and helps skin crisp. Baking soda will make wings taste metallic and bitter.
Use a wire rack always: Never place wings directly on a baking sheet. The rack allows air circulation on all sides, creating crispy skin all around instead of soggy bottoms.
Don't overcrowd: Wings need space for air to circulate. Crowded wings steam instead of roasting, resulting in soggy skin.
High heat is essential: 425°F is the sweet spot for crispy skin and juicy meat. Lower temps won't crisp properly; higher temps may burn before cooking through.
Flip halfway through: Flipping ensures even browning and crisping on both sides. Don't skip this step!
Let wings rest before saucing: A 2-3 minute rest after baking allows the skin to set and become even crispier.
Sauce lightly or serve on side: Heavy saucing makes crispy wings soggy. Toss lightly in sauce or serve sauce on the side for dipping.
Make ahead and reheat: Bake wings fully, cool, refrigerate up to 2 days. Reheat at 400°F for 10-12 minutes to re-crisp before saucing.
Freezer-friendly: Freeze baked unsauced wings for up to 3 months. Reheat from frozen at 400°F for 20-25 minutes, then sauce.
For game day: Bake wings 90% done ahead of time. Finish in the oven right before serving for hot, fresh wings.
Use parchment or foil: Line the baking sheet under the rack with foil for easy cleanup - drippings can burn and stick.
Nutrition Information (Per Serving - 5 wings without sauce):
Calories: 280
Protein: 24g
Carbohydrates: 1g
Fiber: 0g
Sugar: 0g
Fat: 20g
Saturated Fat: 6g
Cholesterol: 95mg
Sodium: 420mg (varies with sauce)
Potassium: 220mg
Calcium: 2% DV
Iron: 6% DV
Note: Nutrition varies significantly based on sauce choice
Health Benefits - Why Baked Wings Are Better:
Baked chicken wings are significantly healthier than traditional deep-fried wings! By baking instead of frying, you eliminate hundreds of calories from the oil absorption that occurs during deep frying. Baked wings have about 30-40% fewer calories and 50% less fat than fried wings while maintaining all the protein and flavor.
Chicken wings provide high-quality protein (24g per serving) which supports muscle maintenance, tissue repair, and keeps you full. They're also a good source of B vitamins, particularly niacin (B3) which supports energy metabolism, and vitamin B6 which supports brain function and immune health.
Wings contain selenium, an important antioxidant that supports thyroid function and immune health. They also provide phosphorus for bone health and zinc for immune function.
The chicken skin, while higher in fat, contains mostly unsaturated fats (the healthier kind) along with some saturated fat. The skin also contains collagen which may support joint and skin health.
To make wings even healthier: remove the skin before eating (though this defeats the crispy purpose!), use hot sauce-based coatings instead of creamy ones, serve with plenty of vegetables (celery, carrots, bell peppers), use light ranch or skip dipping sauces, make Asian-style or lemon pepper for lighter options, or reduce portion size to 4-5 wings as an appetizer.
The biggest health advantage of homemade wings? You control the sodium, sugar, and quality of ingredients - restaurant wings can have 2-3x more sodium!
Frequently Asked Questions (FAQ):
Q: Can I make chicken wings crispy in the oven without frying?
A: Absolutely! The secrets are: thoroughly dry the wings, use baking powder (raises pH), bake on a wire rack at high heat (425°F), flip halfway through, and air-dry in the fridge beforehand if possible. These techniques create restaurant-quality crispy wings!
Q: What's the difference between baking powder and baking soda for wings?
A: Baking POWDER is what you want! It helps the skin crisp up beautifully. Baking SODA will make your wings taste bitter and metallic. They're not interchangeable - always use baking powder.
Q: How do you keep baked wings crispy?
A: Keep wings on a wire rack (not a plate) so air circulates. Don't cover them or they'll steam and soften. Sauce lightly or serve sauce on the side. Eat within 30 minutes of baking for maximum crispiness.
Q: Can I use frozen chicken wings?
A: Yes, but thaw them completely first! Pat them VERY dry after thawing - frozen wings release a lot of moisture. Then proceed with the recipe. Never bake frozen wings - they'll be soggy and won't crisp properly.
Q: Do I need to use a wire rack?
A: Yes! This is essential for crispy wings. The rack allows air to circulate all around the wings, crisping them on all sides. Without a rack, the bottom stays soggy from sitting in its own juices.
Q: Can I prepare wings ahead of time?
A: Yes! Season wings and refrigerate uncovered up to 24 hours ahead (this actually helps them crisp!). Or bake completely, cool, refrigerate for 2 days, then reheat at 400°F for 10 minutes before saucing.
Q: How long do cooked wings last?
A: Refrigerate cooked wings in airtight container for 3-4 days. Reheat at 400°F for 10-12 minutes to re-crisp. Freeze baked unsauced wings for up to 3 months.
Q: What temperature should chicken wings be cooked to?
A: 165°F internal temperature measured with an instant-read thermometer. At 425°F, this takes 45-50 minutes. The wings should also be golden brown with crispy skin.
Q: Can I use an air fryer instead?
A: Yes! Air fryers create extremely crispy wings. Cook at 400°F for 25-30 minutes, flipping halfway. Work in batches to avoid overcrowding.
Q: Why are my baked wings not crispy?
A: Common mistakes: wings weren't dried thoroughly, no baking powder used, baked directly on pan without wire rack, oven temperature too low, wings were overcrowded, or over-sauced. Follow the drying and baking powder steps carefully!
Storage & Meal Prep Instructions:
Refrigerator Storage:
Cool wings completely to room temperature
Store in airtight container for 3-4 days
Store unsauced if possible for best reheating results
Store sauce separately in jar or container
Freezer Storage:
Bake wings completely but do NOT sauce
Cool completely to room temperature
Arrange in single layer on baking sheet and freeze for 1 hour
Transfer frozen wings to freezer bags
Label with date
Freeze for up to 3 months
Reheat from frozen at 400°F for 20-25 minutes
Sauce after reheating
Reheating for Crispiness:
Oven (best): 400°F for 10-12 minutes on wire rack until hot and re-crisped
Air fryer: 375°F for 8-10 minutes, shaking basket halfway
Avoid microwave: Makes wings soggy and rubbery
Game Day Prep Strategy:
Season wings the night before, refrigerate uncovered
Bake wings 90% done (about 40 minutes) up to 2 hours ahead
Keep at room temperature
Finish in 425°F oven for final 10 minutes right before serving
Toss in sauce and serve hot!
Meal Prep:
Bake large batch on Sunday
Portion into containers (6-8 wings each)
Reheat during week for quick protein-packed meals
Serve over salad or with vegetables for complete meals
Troubleshooting Common Problems:
Wings aren't crispy? Didn't dry thoroughly, skipped baking powder, no wire rack used, oven too low, or wings overcrowded. Follow drying steps carefully!
Skin is rubbery? Not cooked long enough or temperature too low. Cook full 45-50 minutes at 425°F until golden and crispy.
Wings are dry inside? Overcooked or oven too hot. Use instant-read thermometer - remove at exactly 165°F. Don't exceed 50 minutes at 425°F.
Wings stick to rack? Didn't spray rack with oil, or tried to remove too early. Spray rack well and let wings cool 2-3 minutes before removing.
Bottom is soggy? Wings placed directly on baking sheet without rack. Must use wire rack for air circulation!
Sauce makes wings soggy? Over-sauced. Toss lightly in sauce or serve sauce on side for dipping. Don't drown wings in sauce.
Uneven cooking? Wings different sizes or overcrowded. Use similarly sized wings and give them space. Flip halfway through.
What to Serve with Chicken Wings:
Classic Sides:
Celery and carrot sticks with ranch or blue cheese
French fries or sweet potato fries
Coleslaw
Potato salad or pasta salad
Corn on the cob
Mac and cheese
For Game Day:
Nachos with cheese
Loaded potato skins
Mozzarella sticks
Onion rings
Chips and dip (guacamole, salsa, queso)
Healthier Options:
Garden salad
Roasted vegetables
Cauliflower bites
Cucumber salad
Fruit platter
Beverages:
Beer (lager, IPA, or wheat beer)
Soft drinks
Iced tea or lemonade
Water with lemon
Related Recipes You'll Love:
Snack Recipes:

Connect
Join our newsletter for fresh health tips
© 2026. All rights reserved.