Classic Chocolate Chip Cookies Recipe | The BEST Homemade
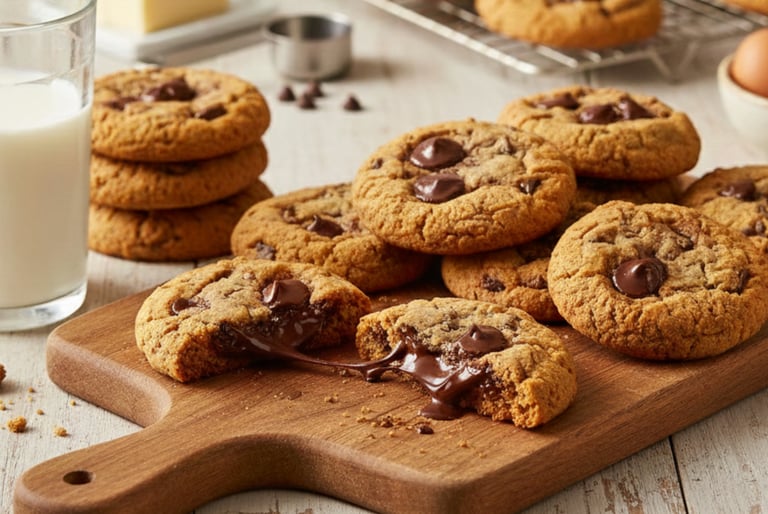
Classic chocolate chip cookies are the ultimate comfort food that delivers nostalgic warmth, chocolatey goodness, and that perfect texture combination of crispy golden edges with soft, chewy centers. These iconic American cookies feature a buttery vanilla dough studded with melty chocolate chips, creating the cookie that everyone knows and loves. Whether you're baking for a special occasion, making treats for your family, or just craving warm cookies, this foolproof recipe produces bakery-quality results every single time.
What makes homemade chocolate chip cookies so special? They taste infinitely better than store-bought with fresh-baked warmth and aroma that fills your whole house. You control the quality of ingredients, the size of cookies, and the chocolate-to-dough ratio. They're incredibly versatile - make them chewy or crispy, load them with extras, or keep them classic. Plus, the dough freezes beautifully, so you can bake fresh cookies anytime the craving hits.
The secret to perfect chocolate chip cookies lies in proper technique: using room temperature butter (not melted!), chilling the dough for at least 30 minutes (this prevents spreading and develops flavor), using a mix of white and brown sugar (brown sugar adds chewiness, white sugar adds crispiness), slightly underbaking for chewy centers, and using quality chocolate chips or chunks. These simple steps transform ordinary cookies into extraordinary bakery-style treats.
This foolproof recipe delivers the ultimate chocolate chip cookie with five amazing variations: Double Chocolate Chunk, Brown Butter Walnut, Salted Caramel, Peanut Butter Chocolate Chip, and Oatmeal Chocolate Chip. You'll learn the science behind chewy vs. crispy cookies, proper mixing techniques, baking temperature secrets, how to achieve that bakery-style thick cookie, and how to store cookies to keep them fresh for weeks. Let's bake the best chocolate chip cookies you've ever tasted!
Prep Time: 15 minutes (plus 30 minutes chilling)
Cook Time: 10-12 minutes per batch
Total Time: 1 hour (including chilling)
Makes: 24 large cookies or 36 medium cookies
Difficulty: Easy
Cuisine: American
Perfect For: Dessert, snacks, gifts, parties
Kid-Friendly: Absolutely!
Freezer-Friendly: Yes (dough and baked cookies)
Ingredients
For Classic Chocolate Chip Cookies:
2¼ cups all-purpose flour (spooned and leveled, not scooped)
1 teaspoon baking soda
1 teaspoon salt (use ½ teaspoon if using salted butter)
1 cup (2 sticks) unsalted butter, softened to room temperature
¾ cup granulated white sugar
¾ cup packed light brown sugar
2 large eggs, at room temperature
2 teaspoons pure vanilla extract
2 cups semi-sweet chocolate chips (or chunks for bakery-style)
Optional: 1 cup chopped walnuts or pecans
For Variations:
Double Chocolate: ⅓ cup cocoa powder (reduce flour to 2 cups) + dark chocolate chunks
Brown Butter: Brown the butter first, then chill until solid again
Sea Salt: Flaky sea salt for sprinkling on top before baking
Espresso: 1 tablespoon instant espresso powder enhances chocolate flavor
How to Make Perfect Chocolate Chip Cookies
Instructions:
Step 1: Prepare Your Ingredients and Equipment (Critical for Success!)
Bring ingredients to room temperature: This is THE most important step! Remove butter and eggs from refrigerator 1-2 hours before baking. Room temperature butter (should be soft enough to leave a fingerprint but still hold its shape) creams properly with sugar, creating the perfect cookie texture. Cold butter won't incorporate well and results in dense, flat cookies. Room temperature eggs blend smoothly into the dough without deflating it.
Measure flour correctly: This is crucial! Too much flour makes dry, cakey cookies. Use the "spoon and level" method: Fluff flour in the bag/container with a spoon, spoon flour into your measuring cup without packing, level off the top with a knife. Never scoop directly with the measuring cup - this packs the flour and gives you 25% more than needed!
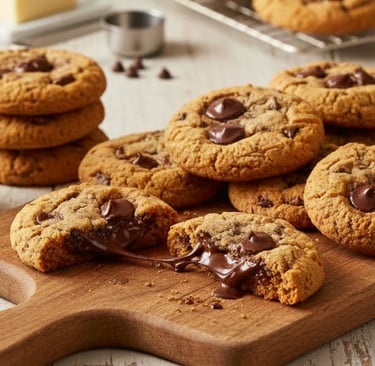
Use quality chocolate: The chocolate is the star! Use good quality chocolate chips or, even better, chop a chocolate bar into chunks for bakery-style cookies. Chocolate chunks create those gorgeous melty pools of chocolate. Recommended brands: Ghirardelli, Guittard, or chopped dark chocolate bars.
Prepare baking sheets: Line two large baking sheets with parchment paper or silicone baking mats. This prevents sticking and promotes even browning. Never use wax paper (it will smoke and potentially catch fire)! Alternatively, lightly grease the baking sheets.
Position oven rack: Place rack in the center of the oven for even heat circulation. Cookies baked on the top rack brown too quickly on top; bottom rack makes bottoms too dark.
Step 2: Mix the Dry Ingredients
Combine flour, baking soda, and salt: In a medium bowl, whisk together 2¼ cups flour, 1 teaspoon baking soda, and 1 teaspoon salt. Whisk for 30 seconds to ensure even distribution - this is your "insurance policy" against getting a salty or soda-heavy bite. Why whisk? It aerates the flour and distributes leavening evenly.
Why baking soda, not baking powder? Baking soda reacts with the brown sugar's acidity to create spread and that beautiful golden color. Baking powder would make the cookies puff up and become cakey rather than chewy.
Set aside: Once whisked, set this bowl aside. You'll add it to the wet ingredients later. Don't combine wet and dry yet - premature mixing develops gluten and makes tough cookies.
Step 3: Cream the Butter and Sugars (Most Critical Step!)
Beat butter until creamy: In a large bowl (or stand mixer fitted with paddle attachment), beat the room temperature butter on medium speed for 1-2 minutes until smooth and creamy. This step is important - it softens the butter's structure and prepares it to hold air.
Add both sugars: Add ¾ cup granulated sugar and ¾ cup packed brown sugar to the butter. Why both sugars? Brown sugar contains molasses which adds moisture and chewiness. White sugar promotes spreading and crispy edges. The combination gives you the perfect chewy-crispy texture.
Cream together until light and fluffy: Beat on medium-high speed for 3-4 minutes. This is critical! The mixture should look pale, fluffy, and increased in volume. You're incorporating air bubbles that will make cookies tender. Don't rush this step! Under-creamed dough makes dense cookies. Scrape down the sides of the bowl halfway through.
Check for proper creaming: The mixture should be noticeably lighter in color (almost white instead of tan), fluffy and voluminous (nearly doubled in size), and when you rub it between your fingers, the sugar should feel mostly dissolved, not gritty.
Step 4: Add Eggs and Vanilla
Add eggs one at a time: Crack the first egg into the butter-sugar mixture. Beat on medium speed until fully incorporated (about 30 seconds). Scrape down the bowl. Add the second egg and beat until combined. Why one at a time? This creates a better emulsion and prevents the mixture from looking curdled or separated.
Mix in vanilla extract: Add 2 teaspoons pure vanilla extract and beat for 10-15 seconds until incorporated. Use real vanilla extract, never imitation! Real vanilla has complex flavors that imitation can't match. The vanilla enhances the butter flavor and rounds out the sweetness.
Check the mixture: At this point, your mixture should look creamy, smooth, and homogeneous - like thick buttercream frosting. If it looks separated or curdled, that's okay - it will come together when you add the flour.
Step 5: Add Dry Ingredients and Chocolate Chips
Add flour mixture gradually: With mixer on LOW speed (important!), add the flour mixture in three additions, mixing just until no white streaks remain after each addition. Stop mixing as soon as flour disappears! Over-mixing develops gluten and makes tough, dense cookies.
Why mix on low? High speed over-mixes the dough, developing gluten strands that make cookies tough and cakey. Low speed gently incorporates flour while keeping cookies tender.
Scrape the bowl: Use a rubber spatula to scrape down the sides and bottom of the bowl, ensuring all flour is incorporated. You may see some flour at the bottom - fold it in by hand with the spatula.
Add chocolate chips: Fold in 2 cups chocolate chips using a rubber spatula or wooden spoon. Mix just until evenly distributed throughout the dough. Pro tip: Reserve ¼ cup chocolate chips to press into the tops of cookie dough balls before baking - this makes them look bakery-perfect!
Add nuts if using: If you want walnut or pecan chocolate chip cookies, fold in 1 cup chopped nuts along with the chocolate chips. Toast the nuts first in a 350°F oven for 5-7 minutes for maximum flavor.
Step 6: Chill the Dough (Don't Skip This!)
Why chill cookie dough? This step is non-negotiable for the best cookies! Chilling accomplishes three things: (1) solidifies the butter so cookies spread less and stay thicker, (2) allows flour to fully hydrate, improving texture, (3) develops flavors as ingredients meld together. Chilled dough = thicker, chewier cookies with better flavor.
Cover and refrigerate: Cover the bowl tightly with plastic wrap or transfer dough to an airtight container. Refrigerate for at least 30 minutes, or up to 72 hours. Longer is better! Dough chilled for 24-72 hours develops even deeper, more complex caramelized flavors. This is the secret to bakery-quality cookies.
Can I skip chilling? You can bake immediately if you're impatient, but cookies will spread more, be thinner, and have slightly less developed flavor. For best results, always chill!
Step 7: Preheat and Prepare for Baking
Preheat oven: About 15 minutes before you're ready to bake, preheat oven to 375°F (190°C). This temperature is the sweet spot - hot enough to set the edges quickly (creating crispiness) while leaving centers soft and chewy.
Why 375°F? Lower temperatures (350°F) make cookies spread too much and become thin and crispy throughout. Higher temperatures (400°F) cause edges to burn before centers cook. 375°F is perfect for that crispy-edge, chewy-center combo.
Prepare baking sheets: Make sure your parchment paper or silicone mats are in place on baking sheets. If reusing baking sheets for multiple batches, let them cool completely between batches. Warm pans cause excessive spreading.
Step 8: Shape and Bake the Cookies
Scoop the dough: Remove dough from refrigerator. Using a cookie scoop (2-tablespoon size for large bakery-style cookies, or 1-tablespoon size for medium cookies), scoop dough and roll each portion into a ball between your palms. Pro tip: Weigh dough balls for uniform cookies - about 3 tablespoons (45g) for large cookies.
Space cookies properly: Place dough balls on prepared baking sheets, spacing them 3 inches apart. They will spread significantly! Only bake 6-8 large cookies per standard baking sheet. Overcrowding causes cookies to merge together.
Create bakery-style appearance: Gently press 3-4 extra chocolate chips into the top of each dough ball. This creates those picture-perfect cookies with visible chocolate on top. You can also gently press dough balls to flatten slightly (about ¾ inch thick) - this promotes even baking.
Bake to perfection: Bake for 10-12 minutes for large cookies (8-10 minutes for medium cookies) until edges are golden brown but centers still look slightly underdone and puffy. This is critical: Cookies continue baking on the hot pan after removal, so you want to pull them when they look slightly underbaked. They'll firm up as they cool.
Visual cues for doneness:
Edges should be golden brown and set
Centers should look slightly puffy and soft (they may even look a bit wet - that's perfect!)
Cookies should NOT be brown all over - this means overbaked
A light touch in the center should leave a slight indent
Rotate halfway through: If your oven has hot spots, rotate the baking sheet 180 degrees halfway through baking time for even browning.
Step 9: Cool and Finish
Let cookies set on pan: This is crucial! When cookies come out of the oven, let them cool on the baking sheet for 5 minutes. They're very delicate when hot and will break if moved too soon. During these 5 minutes, they finish cooking from residual heat and firm up enough to transfer.
Transfer to cooling rack: After 5 minutes, use a thin metal spatula to carefully transfer cookies to a wire cooling rack. Why a wire rack? It allows air circulation underneath, preventing soggy bottoms. If you don't have a rack, transfer to a plate lined with paper towels.
Optional: Sea salt finishing touch: While cookies are still warm (within 1 minute of transferring to rack), sprinkle each cookie with a tiny pinch of flaky sea salt. This enhances the sweetness and adds gourmet flavor. Maldon or fleur de sel work beautifully.
Cool completely or enjoy warm: Cookies can be enjoyed warm (the chocolate will be melty and gooey - amazing!) or cooled completely for traditional texture. Fully cooled cookies have the classic chewy-crispy texture. Warm cookies are softer and more cake-like.
Bake remaining batches: While first batch cools, repeat scooping and baking with remaining dough. Remember to let baking sheets cool completely between batches or dough will spread excessively.
Step 10: Storage for Maximum Freshness
Cool completely before storing: This is important! Storing warm cookies creates condensation in the container, making cookies soggy and reducing shelf life.
Layer with parchment: Store cooled cookies in an airtight container with parchment paper between layers to prevent sticking. They'll stay fresh at room temperature for up to 1 week.
Keep them soft: Want extra-soft cookies? Place a slice of bread in the container with the cookies. The cookies will absorb moisture from the bread, staying softer longer. Replace bread slice every 2-3 days.
Variation 2: Double Chocolate Chunk Cookies
Ingredient Modifications:
Reduce: All-purpose flour to 2 cups
Add: ⅓ cup unsweetened cocoa powder (Dutch-process for deeper flavor)
Replace: Semi-sweet chips with 2 cups dark chocolate chunks
Optional: ½ cup white chocolate chips for contrast
Instructions:
Whisk cocoa powder with the flour, baking soda, and salt.
Proceed with recipe as written.
Use chopped dark chocolate bars instead of chips for melty pockets.
These ultra-chocolatey cookies are fudgy and rich.
Bake for 11-13 minutes - they should look slightly underdone.
Perfect for serious chocolate lovers!
Variation 3: Brown Butter Chocolate Chip Cookies
Ingredient Modifications:
Brown the butter: Melt butter in saucepan over medium heat, stirring constantly until golden brown with nutty aroma (5-7 minutes). Pour into heatproof bowl, chill until solid again (2-3 hours or overnight).
Increase: Salt to 1¼ teaspoons (brown butter is less salty than regular butter)
Instructions:
Brown butter ahead of time and let solidify completely.
Use solidified brown butter exactly like regular butter in recipe.
Brown butter adds incredible nutty, caramel-like depth.
The cookies have a more complex, sophisticated flavor.
Chill dough for 24 hours for maximum flavor development.
These are next-level gourmet cookies!
Variation 4: Salted Caramel Chocolate Chip Cookies
Ingredient Modifications:
Add: ¾ cup caramel bits or chopped soft caramels
Add: 1 teaspoon flaky sea salt (for dough)
Top: Extra sea salt for sprinkling before baking
Instructions:
Make dough as directed.
Fold in caramel bits along with chocolate chips.
Add 1 teaspoon sea salt to the dough for sweet-salty balance.
Sprinkle each cookie with flaky sea salt before baking.
The caramel melts into gooey pockets of sweetness.
These taste like fancy bakery cookies!
Variation 5: Peanut Butter Chocolate Chip Cookies
Ingredient Modifications:
Reduce: Butter to ¾ cup (1½ sticks)
Add: ½ cup creamy peanut butter
Add: 1 cup peanut butter chips
Keep: 1 cup chocolate chips
Instructions:
Cream butter, peanut butter, and sugars together until fluffy.
Proceed with recipe as written.
Use half chocolate chips and half peanut butter chips.
Optional: Press a peanut butter cup into center of each dough ball.
These have amazing peanut butter-chocolate combo flavor.
Bake for 10-11 minutes - they brown faster than regular cookies.
Variation 6: Oatmeal Chocolate Chip Cookies
Ingredient Modifications:
Reduce: Flour to 1¾ cups
Add: 1½ cups old-fashioned rolled oats
Add: 1 teaspoon ground cinnamon
Optional: ½ cup raisins in addition to chocolate chips
Instructions:
Whisk oats and cinnamon with the flour mixture.
Let dough rest 10 minutes after mixing (oats absorb moisture).
Proceed with recipe as written.
These are heartier with great texture from oats.
The cinnamon adds warmth and spice.
Perfect for breakfast cookies (just kidding... or are we?).
Chef's Tips & Pro Secrets:
Room temperature = success: Cold ingredients don't cream properly or blend smoothly. Plan ahead and leave butter and eggs out 1-2 hours before baking.
Don't skip chilling: Chilled dough = thicker, chewier cookies with better flavor. Chill for at least 30 minutes, preferably 24-72 hours for bakery-quality results.
Underbake slightly: Cookies finish cooking on the hot pan after removal. Pull them when centers look slightly underdone for perfect chewy texture.
Use parchment or silicone mats: These prevent sticking and promote even browning. They're reusable, economical, and make cleanup easy.
Measure flour correctly: Spoon and level, never scoop! Too much flour makes dry, cakey cookies.
Cream butter and sugar thoroughly: This 3-4 minute step incorporates air for tender cookies. Don't rush it!
Mix on low speed after adding flour: High speed develops gluten, making tough cookies. Mix just until flour disappears.
Use quality chocolate: The chocolate is the star! Use good brands or chop chocolate bars for chunks.
Uniformly sized cookies bake evenly: Use a cookie scoop for consistent results. Weigh dough for precision (45g per large cookie).
Space cookies 3 inches apart: They spread significantly! Overcrowding causes merged cookies.
Cool pans between batches: Warm pans cause excessive spreading. Let cool completely or use multiple pans.
Freeze dough for future baking: Scoop and freeze dough balls on a baking sheet, then transfer to freezer bags. Bake from frozen, adding 1-2 minutes to bake time. Fresh cookies anytime!
Nutrition Information (Per Cookie - based on 24 large cookies):
Calories: 180
Protein: 2g
Carbohydrates: 24g
Fiber: 1g
Sugar: 16g
Fat: 9g
Saturated Fat: 5g
Cholesterol: 30mg
Sodium: 135mg
Potassium: 60mg
Calcium: 1% DV
Iron: 6% DV
Note: Nutrition varies based on size and add-ins
Health Benefits - Can Cookies Be Good For You?
While chocolate chip cookies are definitely a treat, homemade versions are significantly better than store-bought! By making them yourself, you eliminate artificial preservatives, trans fats, and excessive sodium found in packaged cookies. You control the quality of ingredients, using real butter instead of shortening, pure vanilla instead of artificial flavoring, and quality chocolate instead of compound coating.
Dark chocolate chips (70% cacao or higher) contain antioxidants called flavonoids which may support heart health and reduce inflammation. Dark chocolate also provides small amounts of iron, magnesium, and fiber.
Eggs in cookies provide high-quality protein and important nutrients like choline (supports brain health) and selenium (antioxidant properties). The eggs also contain vitamins A, D, E, and B12.
Butter, while high in saturated fat, provides fat-soluble vitamins (A, D, E, K) and conjugated linoleic acid (CLA) which may have health benefits. Real butter is minimally processed compared to margarine and vegetable shortening.
Using whole grain flour instead of all-purpose flour adds fiber, B vitamins, and minerals. You can substitute up to half the all-purpose flour with whole wheat flour without dramatically changing texture.
To make healthier cookies: reduce sugar by ¼ cup (cookies will still be sweet), use dark chocolate chips (70% cacao), replace half the butter with mashed banana or Greek yogurt (changes texture but reduces fat), add ground flaxseed or chia seeds for omega-3s and fiber, use whole wheat pastry flour for half the flour, add chopped nuts for healthy fats and protein, or reduce portion size to 1-tablespoon cookies.
The biggest advantage of homemade? Portion control and mindful enjoyment! Having 1-2 homemade cookies as an occasional treat is far better than mindlessly eating an entire package of store-bought cookies. Plus, the act of baking itself can be therapeutic and rewarding!
Frequently Asked Questions (FAQ):
Q: Why do my cookies spread too much and turn out flat?
A: Common causes: butter was too warm/melted, dough wasn't chilled, too much sugar, not enough flour, oven temperature too low, or baking sheets were warm. Always chill dough 30+ minutes and use room temperature (not melted) butter.
Q: Why are my cookies cakey instead of chewy?
A: Too much flour (use spoon-and-level method), too much baking soda, over-mixing the dough, or overbaking. Mix just until flour disappears and pull cookies when centers look slightly underdone.
Q: Can I use melted butter instead of softened butter?
A: No! Melted butter creates a different texture - cookies spread more and become thin and crispy rather than thick and chewy. Always use softened room temperature butter that still holds its shape.
Q: How do I know when cookies are done?
A: Edges should be golden brown and set, but centers should look slightly puffy and soft - even a bit underdone. They continue cooking on the hot pan. If cookies are brown all over, they're overbaked.
Q: Can I freeze cookie dough?
A: Yes! Scoop dough into balls, freeze on a baking sheet until solid, then transfer to freezer bags. Freeze up to 3 months. Bake from frozen at 375°F for 12-14 minutes (add 1-2 minutes to bake time). Perfect for fresh cookies anytime!
Q: How do I store baked cookies?
A: Cool completely, then store in airtight container at room temperature for up to 1 week. For longer storage, freeze baked cookies in freezer bags for up to 3 months. Thaw at room temperature.
Q: Can I make the dough ahead?
A: Absolutely! Dough can be refrigerated up to 72 hours (flavors develop and improve!). Dough can also be frozen for up to 3 months. Thaw frozen dough overnight in refrigerator before baking.
Q: Why don't my cookies look like bakery cookies with those thick centers?
A: Key tips: chill dough thoroughly, use more dough per cookie (3-tablespoon scoops), slightly underbake, and let cookies cool on the pan for 5 minutes to set. You can also chill scooped dough balls for 30 minutes before baking.
Q: Can I substitute ingredients?
A: Some substitutions work: margarine for butter (texture suffers slightly), all brown sugar for chewier cookies, all white sugar for crispier cookies, or different types of chocolate chips. Don't substitute baking powder for baking soda - they're different!
Q: How do I make cookies without eggs?
A: Replace each egg with 3 tablespoons aquafaba (chickpea liquid) or use commercial egg replacer. Texture will be slightly different but still delicious. Flax eggs (1 tablespoon ground flax + 3 tablespoons water per egg, let sit 5 minutes) also work.
Storage & Make-Ahead Instructions:
Room Temperature Storage:
Cool cookies completely before storing
Store in airtight container with parchment between layers
Keep at room temperature for up to 1 week
Add slice of bread to keep cookies soft (replace bread every 2-3 days)
Refrigerator Storage:
Not recommended for baked cookies (makes them hard)
Cookie dough can be refrigerated up to 72 hours
Cover dough tightly with plastic wrap or store in airtight container
Let dough sit at room temperature 10 minutes before scooping if very hard
Freezer Storage - Dough:
Scoop dough into balls using cookie scoop
Place on parchment-lined baking sheet, not touching
Freeze until solid (about 2 hours)
Transfer frozen dough balls to freezer-safe bags
Label with date and baking instructions
Freeze up to 3 months
Bake from frozen - add 1-2 minutes to bake time
No need to thaw before baking!
Freezer Storage - Baked Cookies:
Cool cookies completely
Place in single layer in freezer-safe container or bag
Separate layers with parchment paper
Freeze up to 3 months
Thaw at room temperature for 30 minutes
Optional: Warm thawed cookies in 300°F oven for 5 minutes to refresh
Make-Ahead Strategy for Parties:
Make dough 1-3 days ahead (flavor improves!)
Keep covered in refrigerator
Scoop dough 2-3 hours before party
Bake cookies 1-2 hours before serving
Serve slightly warm for best flavor
Gift-Giving Prep:
Bake cookies 1 day ahead
Store in airtight container overnight
Package in decorative tins or boxes day of gifting
Include reheating instructions: 300°F for 5 minutes
Cookies stay fresh for gift recipients for up to 5 days
Dough Ball Freezing Benefits:
Bake fresh cookies anytime without making dough
Perfect for unexpected guests
Control portions (bake only what you want)
Dough stays fresh for 3 months
Most convenient make-ahead method!
Troubleshooting Common Problems:
Cookies spread too much and turn out flat?
Butter was too warm or melted
Dough wasn't chilled long enough
Baking sheets were still warm from previous batch
Too much sugar or too little flour
Fix: Chill dough longer, cool pans completely, measure flour correctly
Cookies are too cakey/puffed up?
Too much flour (scoop-and-sweep method adds 25% more flour)
Too much baking soda
Not enough butter or sugar
Over-mixing the dough
Fix: Use spoon-and-level method for flour, mix just until combined
Cookies are hard/crispy instead of chewy?
Overbaked (even 1-2 minutes matters!)
Too much white sugar, not enough brown sugar
Not enough butter
Fix: Pull cookies when centers look underdone, increase brown sugar ratio
Cookies are too soft/underbaked?
Oven temperature too low (use oven thermometer)
Cookies too thick
Didn't bake long enough
Fix: Check oven temperature, flatten dough balls slightly, bake 1-2 minutes longer
Cookies stick to pan?
Didn't use parchment paper or baking mat
Pan not greased properly
Removed cookies too soon (they're delicate when hot)
Fix: Always use parchment, let cool 5 minutes before moving
Cookies merged together during baking?
Placed too close together (need 3 inches between)
Dough balls too large
Dough too warm
Fix: Space properly, reduce dough ball size, chill dough
Cookies browned too much on bottom?
Oven rack too low
Dark-colored baking sheets (absorb more heat)
Oven too hot
Fix: Use center rack, light-colored pans, reduce temp to 350°F
What to Serve with Chocolate Chip Cookies:
Classic Pairings:
Cold milk (whole milk is best - the fat cuts the sweetness)
Hot coffee or espresso
Hot chocolate with marshmallows
Vanilla ice cream (make ice cream sandwiches!)
Tea (black tea, chai, or Earl Grey)
Warm apple cider
Dessert Presentations:
Cookie ice cream sundae (warm cookie + vanilla ice cream + hot fudge)
Cookie milkshake (blend cookies with ice cream and milk)
Cookie butter (crumble cookies and blend with cream cheese for spread)
Cookie trifle (layer with pudding and whipped cream)
Deconstructed cookie (serve warm with vanilla ice cream on the side)
Creative Serving Ideas:
Breakfast: Crumble over yogurt parfait
Snack: Pair with fresh berries
Dessert board: Include cookies with fruit, cheese, nuts, and chocolate
S'mores: Use cookies instead of graham crackers
Cheesecake crust: Crush cookies for crust
Cookie Platters for Parties:
Variety platter with all 6 cookie variations
Include classic, double chocolate, and peanut butter
Arrange on tiered stand for visual appeal
Provide small plates and napkins
Label each variety with tent cards
Beverage Pairings:
Milk: Classic for a reason - cuts sweetness
Coffee: Bold coffee complements chocolate
Tea: Earl Grey, chai, or English breakfast
Hot chocolate: Ultimate chocolate indulgence
Wine: Port, dessert wine, or sweet Riesling
Bourbon or whiskey: For adult cookie time
Related Snack Recipes You'll Love:
Snack Recipes:
Connect
Join our newsletter for fresh health tips
© 2026. All rights reserved.