High Protein Lunch Recipes for School: 15 Easy Ideas Kids and Teens Will Actually Eat
Most school lunches have 5–8g protein. These 15 recipes have 12–28g each. Kids love them. Full recipes with batch prep guide and protein counts per serving
by BiteBrightly
5/9/202621 min read
High Protein Lunch Recipes for School: 15 Easy Ideas Kids and Teens Will Actually Eat
By BiteBrightly 9 May 2026: This post might contain affiliate links.
If you have ever watched your child trade half their lunch for someone's crisps or come home from school saying "I'm starving" ten minutes after they get back, you already know the problem. Most school lunches — even the ones that look healthy — are built around carbohydrates with very little protein. A sandwich, a bag of crisps, a piece of fruit, and a juice box might tick all the visual boxes but leaves most children hungry again within an hour.
When children eat adequate protein at lunch, they stay fuller for longer because protein activates the satiety hormones GLP-1 and PYY more effectively than carbohydrates or fat. Their blood sugar stays stable — no mid-afternoon energy crash, no difficulty concentrating in the last lesson of the day, no ravenous hunger on the way home. And they provide the amino acids that growing bodies and brains need continuously for muscle development, neurotransmitter production, and the cell repair that happens around the clock.
The challenge is making protein-rich lunches that children actually want to eat. This guide solves that problem — 15 high-protein school lunch recipes that are genuinely delicious, easy to prepare, pack well in a lunchbox, and provide the protein that growing children and teenagers need to thrive through a full school day.
Key Takeaways
Children aged 4–8 need approximately 19g of protein per day. Children aged 9–13 need approximately 34g. Teenagers need 46–52g. A good high-protein school lunch should provide 15–25g — roughly half the daily total
Protein at lunch specifically stabilises blood sugar and supports cognitive function in the afternoon — research consistently shows that children who eat adequate protein at midday perform better in afternoon lessons than those eating high-carbohydrate, low-protein lunches
The best school lunch proteins are those that pack well without refrigeration or with a small ice pack — eggs, cheese, Greek yogurt, legumes, chicken, tuna, turkey, and edamame are all excellent choices
Presentation matters enormously for children — the same food in a boring format gets rejected while the same food in a fun, colourful, bite-sized format gets eaten. Most of these recipes use this principle deliberately
Research from the American Journal of Clinical Nutrition confirmed that higher protein intake at lunch in school-age children was associated with significantly better afternoon cognitive performance, attention, and working memory compared to children eating equal-calorie lower-protein lunches
Batch preparation is the single most important practical strategy for consistent high-protein school lunches — spending 30–40 minutes on Sunday preparing proteins, sauces, and components means weekday morning assembly takes under 5 minutes
The Protein Needs of Growing Children
Before the recipes, a quick look at why protein matters so much for school-age children — because understanding this makes it easier to prioritise in a lunchbox.
Brain Development and Concentration
Your brain runs on glucose, but it is built from protein. Neurotransmitters — the chemical messengers that control mood, focus, and learning — are made from amino acids. Serotonin is made from tryptophan. Dopamine is made from tyrosine. GABA is influenced by glutamine. The ability to concentrate, stay calm, and engage productively in afternoon lessons depends in part on having adequate amino acid supply from what was eaten at lunch.
When children eat a high-carbohydrate, low-protein lunch, blood sugar spikes and then drops sharply by mid-afternoon. This blood sugar crash triggers cortisol and adrenaline — stress hormones that produce the irritability, difficulty concentrating, and restless energy that many parents and teachers observe in children around 2–3pm. A protein-rich lunch prevents this crash entirely.
Muscle Growth and Physical Development
Children's bodies are growing continuously — building muscle, bone, connective tissue, and organ structure at a pace that slows down significantly after adolescence. This growth requires a continuous supply of essential amino acids. Unlike fat or carbohydrates, amino acids cannot be stored for later use — the body needs a fresh supply at each meal for optimal growth processes.
The Satiety Advantage
Protein activates GLP-1, PYY, and CCK — the three primary satiety hormones — more powerfully than either carbohydrates or fat. For a child sitting through afternoon lessons, a high-protein lunch means the difference between being able to focus and feeling distracted by hunger by 2pm.
The 15 Best High-Protein School Lunch Recipes
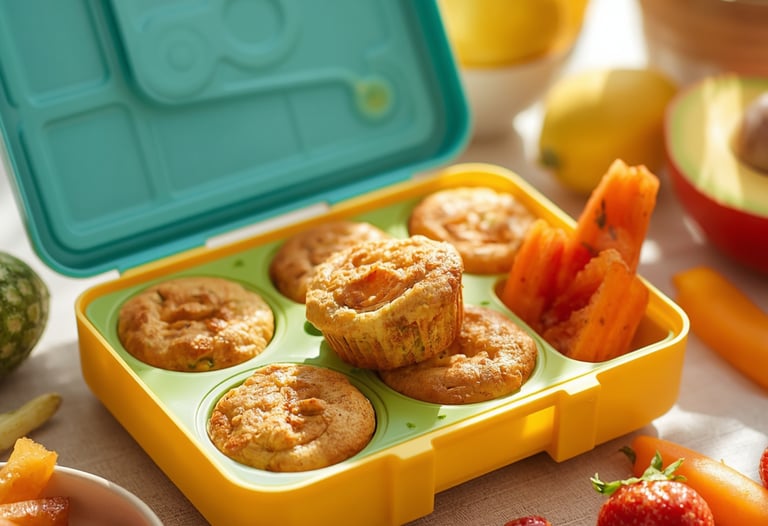
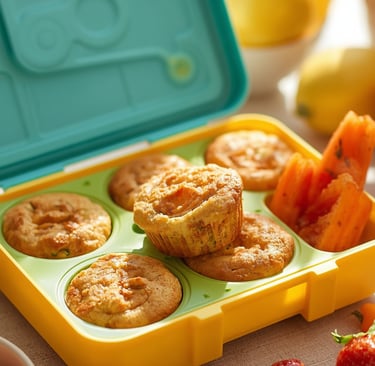
1. Protein-Packed Egg Muffins
These mini egg muffins are the ultimate school lunch protein hack — made in a 12-cup muffin tin in 20 minutes, each one provides approximately 6–7g of protein, and they pack perfectly in a lunchbox at room temperature for up to 4 hours or with a small ice pack for the full school day.
Protein per serving (3 muffins): Approximately 19–21g protein
Why children love them: They look fun and bite-sized. They can be customised with different fillings. They taste like a miniature omelette. They are easy to eat without cutlery.
Ingredients (makes 12 muffins):
6 large eggs
3 tablespoons milk
½ cup grated cheddar cheese
¼ cup diced ham or cooked crumbled bacon (optional)
¼ cup finely diced red bell pepper
2 tablespoons finely chopped spinach
¼ teaspoon salt
Pinch of black pepper
Butter or cooking spray for the tin
How to make them:
Preheat your oven to 180°C (350°F / Gas mark 4)
Grease a 12-cup mini muffin tin (or use silicone — much easier to remove) very well with butter or spray, making sure to coat the sides as well as the bottoms
Whisk the eggs and milk together in a large jug until fully combined — using a jug makes it easy to pour into the muffin cups
Stir in the cheese, ham if using, bell pepper, spinach, salt, and pepper
Pour the egg mixture into each muffin cup, filling approximately three-quarters full — leave space as they puff up during baking
Bake for 15–18 minutes until the tops are set and just starting to turn golden at the edges. A toothpick inserted in the centre should come out clean
Allow to cool in the tin for 5 minutes before removing — they deflate slightly as they cool, which is normal
Store in the fridge for up to 4 days
Lunchbox tip: Pack 3 muffins with a small container of cherry tomatoes and some cucumber sticks for a complete protein-and-vegetable lunch.
Make it your child's: Use whatever fillings your child loves — cheese only, sweetcorn and cheese, chopped cooked broccoli, or different cheese varieties. The base recipe stays the same; the fillings are endlessly customisable.
2. Turkey and Cheese Pinwheels
Pinwheels are one of the most child-friendly lunch formats available — they are colourful, fun to eat, and can be packed without getting soggy. Each tortilla makes 6–8 pinwheels, providing a complete protein-rich lunch in a format children actually get excited about.
Protein per serving (6 pinwheels from 1 tortilla): Approximately 22–25g protein
Why children love them: They look fun and colourful. They are easy to pick up with small hands. They feel different from an ordinary sandwich. They do not get soggy.
Ingredients (makes 1 lunchbox portion):
1 large whole wheat or spinach tortilla
2 tablespoons cream cheese or hummus (cream cheese helps the tortilla hold together when sliced)
3–4 slices of lean turkey breast
2 slices of cheddar or Swiss cheese
A few leaves of baby spinach or shredded lettuce
4–5 slices of cucumber or thinly sliced red bell pepper
Optional: a thin spread of mild mustard for older children
How to make them:
Lay the tortilla flat on a clean chopping board
Spread cream cheese or hummus in a thin, even layer right to the edges — this is the "glue" that holds the roll together when sliced
Layer turkey slices evenly across the tortilla, leaving a 2cm gap at the far edge (so the roll seals properly when you finish rolling)
Layer cheese slices on top of the turkey
Scatter spinach leaves and cucumber or pepper slices across the cheese layer
Starting from the near edge, roll the tortilla firmly but not too tightly — like rolling a sushi roll. Apply gentle, even pressure as you roll
Wrap the completed roll tightly in cling film or reusable food wrap
Refrigerate for at least 15 minutes before slicing — the chilling firms everything up and makes clean cuts much easier
Using a sharp knife, slice into 6–8 rounds approximately 2cm thick
Pack in a lunchbox — they hold their shape well for 6 hours with an ice pack
Make it your child's: Swap turkey for thinly sliced chicken breast, smoked salmon, or roast beef. Use different cheese varieties. Add a thin spread of avocado instead of cream cheese for older children.
3. Greek Yogurt and Berry Parfait
A Greek yogurt parfait is one of the most protein-dense sweet lunch items available — perfect for children who prefer a sweeter lunch option or as a dessert addition to a savory main item.
Protein per serving: Approximately 17–20g protein
Why children love them: They look beautiful. They feel like a treat. The layers of different textures (creamy, crunchy, soft berries) are genuinely exciting. They can be made the night before.
Ingredients (1 portion):
¾ cup plain full-fat Greek yogurt
½ cup mixed berries (strawberries, blueberries, raspberries — fresh or frozen and defrosted)
2 tablespoons low-sugar granola or rolled oats
1 teaspoon honey
Optional: a few mini dark chocolate chips on top
How to make it:
In a small jar or container with a tight-fitting lid (a small mason jar works brilliantly for this), spoon half the Greek yogurt as the bottom layer
Add half the berries on top of the yogurt
Spoon the remaining yogurt over the berries
Add the remaining berries on top
Drizzle with honey
Seal and refrigerate overnight or prepare fresh in the morning
Pack the granola in a tiny separate container — add it on top just before eating at school to keep the crunch
Lunchbox tip: If packing this with the granola already in, the granola will soften but still taste good. For maximum crunch, use a small zip-lock bag for the granola and let your child add it themselves at lunch.
Make it their own: Allow children to choose their favourite berries or fruits. Some children prefer sliced strawberries and banana. Others like mango pieces. The yogurt base stays the same.
4. Tuna and Sweetcorn Whole Grain Sandwich
This is an upgraded version of the classic tuna sandwich — boosted with Greek yogurt instead of mayonnaise for extra protein, and packed in a whole grain wrap or bread for the fibre that slows glucose absorption and extends fullness.
Protein per serving: Approximately 28–32g protein
Why children love it: It tastes familiar (like the classic tuna mayo they already know). The sweetcorn adds sweetness and crunch. The whole grain bread or wrap makes it feel substantial.
Ingredients (makes 2 sandwiches or 1 wrap):
1 can (120g) tuna in spring water, drained very well
2 tablespoons plain Greek yogurt (replaces mayonnaise — provides extra protein)
1 tablespoon mayonnaise (a small amount for flavour — optional but improves taste for children)
3 tablespoons sweetcorn kernels (canned or frozen and defrosted)
1 teaspoon lemon juice
Salt and pepper
2 slices whole grain bread or 1 large whole grain wrap
Lettuce leaves and cucumber slices for adding to the sandwich
How to make it:
Drain the tuna very thoroughly — press with the back of a spoon in the can to remove as much liquid as possible. Wet tuna makes sandwiches soggy
In a bowl, mix drained tuna, Greek yogurt, mayonnaise if using, sweetcorn, lemon juice, salt, and pepper until well combined
Taste and adjust seasoning
Store the tuna mixture in a sealed container in the fridge for up to 2 days
In the morning, spread on whole grain bread and add lettuce and cucumber just before closing the sandwich
Wrap the sandwich in baking paper or a reusable wrap rather than cling film — it keeps the bread from going soggy better
Lunchbox tip: Pack the tuna filling and bread separately and let children assemble their own at school if they are old enough — this prevents any sogginess completely and gives children a sense of autonomy over their lunch.
5. Chicken and Veggie Skewers With Dipping Sauce
Chicken skewers are a lunch format that transforms boring protein into something fun and interactive. Children love eating food on sticks, and the dipping sauce element makes it genuinely exciting.
Protein per serving: Approximately 24–26g protein
Why children love them: They are fun to eat on little sticks. The dipping sauce is interactive. They feel different from a regular sandwich. They look colourful.
Ingredients (makes 1 lunchbox portion):
120g (4oz) cooked chicken breast, cut into 2cm cubes
½ cup cherry tomatoes
¼ cucumber, cut into chunks
¼ yellow or orange bell pepper, cut into pieces
4–6 small wooden or reusable food-safe skewers
Simple dipping sauce (choose one):
Honey mustard: 2 tbsp Greek yogurt + 1 tsp honey + 1 tsp mild mustard
Mild hummus: 2–3 tablespoons of shop-bought or homemade hummus
Tzatziki: 2 tbsp Greek yogurt + grated cucumber + pinch of garlic powder + lemon
How to make them:
Thread cooked chicken pieces and vegetables alternately onto skewers — alternate colours for visual appeal
Make the chosen dipping sauce and place in a small pot or container with a tight lid
Pack the skewers in a shallow lunchbox or container. If the skewers are too long, trim them with scissors or break the wooden tip off
Pack the dipping sauce separately
Lunchbox tip: The chicken can be batch cooked at the beginning of the week — bake or poach 4–5 chicken breasts on Sunday and refrigerate for use throughout the week.
Make it their own: Let children choose which dipping sauce they want. Some children prefer just a little mayonnaise for dipping. Others love hummus. The choice gives them ownership over their lunch.
6. Cottage Cheese and Pineapple Lunchbox
This sweet-and-creamy combination is a surprisingly popular choice with children — the mild, slightly salty flavour of cottage cheese contrasts perfectly with the sweet pineapple, creating a flavour combination that many children find addictive.
Protein per serving: Approximately 22–25g protein
Why children love it: The sweet-salty combination is genuinely delicious. It feels creamy and satisfying. It is easy to eat with a spoon. It is different from what most other children bring.
Ingredients (1 portion):
¾ cup plain full-fat cottage cheese
½ cup pineapple chunks (fresh or canned in juice, drained well — not in syrup)
1 tablespoon pumpkin seeds for crunch
Optional: a few blueberries or halved grapes for extra colour
Optional: a very light drizzle of honey
How to make it:
Spoon cottage cheese into a small container
Top with pineapple chunks
Scatter pumpkin seeds over the top
Add berries or grapes if using
Drizzle very lightly with honey if desired
Seal with a tight lid — cottage cheese transports very well
Lunchbox tip: This snack keeps well for up to 6 hours in a lunchbox with an ice pack. The pineapple actually gets more tender and sweeter as it sits in contact with the cottage cheese — making it taste even better at lunchtime than it does when freshly made.
7. Edamame and Cheese Lunchbox
Edamame — young green soybeans — is one of the most protein-dense plant foods available, and its bright green colour, fun popping texture (when eating from the pod), and mild flavour make it popular with many children.
Protein per serving (edamame + cheese combined): Approximately 20–22g protein
Why children love it: The pods make it interactive and fun to eat. The bright green colour is visually appealing. It is different and interesting. The cheese adds familiar flavour and satisfaction.
Ingredients (1 portion):
1 cup frozen edamame in pods (or ½ cup shelled edamame if preferred)
30g (1oz) cheddar cheese, cubed
A few cherry tomatoes
4–5 whole grain crackers
Optional: a small container of hummus for dipping
How to prepare:
Cook the edamame: bring a small pot of water to a boil, add the edamame, and cook for 3–4 minutes until bright green. Alternatively, microwave in a covered bowl with 2 tablespoons of water for 3 minutes
Drain and sprinkle with a very small pinch of sea salt while still warm — the salt helps children enjoy them
Allow to cool completely before packing — warm edamame makes the lunchbox warm and can affect other items
Pack the cooled edamame with the cheese cubes, cherry tomatoes, and crackers in separate compartments of the lunchbox
Teaching tip for younger children: Show children how to squeeze the bean out of the pod — the popping sound and action is part of what makes edamame exciting for children who have never had it before.
8. Mini Caprese Skewers With Prosciutto
This elegant little snack brings the protein of prosciutto and mozzarella together with the freshness of cherry tomatoes and basil in a form that children find genuinely beautiful and exciting to eat.
Protein per serving: Approximately 18–20g protein
Why children love them: They look impressive and colourful. Eating food on sticks is fun. The prosciutto feels like a special treat. They are easy to eat without making a mess.
Ingredients (makes 1 lunchbox portion — approximately 8 skewers):
4 slices prosciutto or good quality ham, torn in half
8 mini mozzarella balls (bocconcini) or 4 regular mozzarella balls cut in half
8 cherry tomatoes
8 fresh basil leaves
1 tablespoon extra-virgin olive oil
A small pinch of sea salt and black pepper
8 small wooden picks or skewers
How to make them:
Thread each skewer in this order: cherry tomato, basil leaf, a fold of prosciutto, mozzarella ball
Arrange in a flat, shallow lunchbox container
Drizzle with a tiny amount of olive oil
Season with a very small pinch of salt and pepper
Lunchbox tip: These keep well for 5–6 hours with an ice pack. The tomatoes may release a little juice — packing them on top of a small piece of kitchen paper helps absorb this.
9. Peanut Butter and Banana Protein Roll
This is the child-friendly high-protein alternative to a plain peanut butter sandwich — more protein, better nutrition, and a format that feels genuinely different and exciting.
Protein per serving: Approximately 14–16g protein
Why children love it: Peanut butter and banana is a universally loved flavour combination. The roll format is fun. It is sweet and satisfying. It feels like a treat while being genuinely nutritious.
Ingredients (makes 1 roll):
1 medium whole wheat or plain tortilla
2 tablespoons natural peanut butter (or any nut or seed butter for allergy-aware schools)
1 medium ripe banana
1 teaspoon honey
Optional: a sprinkle of cinnamon
Optional: 1 tablespoon of hemp seeds or ground flaxseed stirred into the peanut butter for extra protein and omega-3
How to make it:
Lay the tortilla flat
Spread peanut butter evenly across the entire surface, going right to the edges
If using hemp seeds or flaxseed, mix them into the peanut butter before spreading
Drizzle honey over the peanut butter in a thin, even layer
Dust with cinnamon if using
Place the banana across the near edge of the tortilla at a slight angle
Roll the tortilla firmly and tightly around the banana, similar to a burrito
Wrap tightly in cling film or beeswax wrap — this holds everything together during transport
Allergy note: Many schools are nut-free environments. Sunflower seed butter (SunButter) is an excellent nut-free alternative that provides similar protein and fat content to peanut butter, with a very similar flavour profile that most children accept easily.
10. Hard-Boiled Eggs With Dipping Salt
Simple, portable, and one of the highest protein-to-calorie ratio foods available. Hard-boiled eggs are the easiest batch-prep school lunch component — boil six on Sunday, they are ready all week.
Protein per serving (2 eggs): Approximately 12–13g protein
Why children love them: Peeling hard-boiled eggs can be a satisfying activity. Dipping food in flavoured salt feels interactive and fun. They are portable and mess-free. They taste genuinely good.
Ingredients (1 portion):
2 large hard-boiled eggs, peeled
¼ teaspoon seasoning salt or flavoured dipping salt options (see below)
A selection of accompaniments: cherry tomatoes, cucumber sticks, cheese cubes, whole grain crackers
Flavoured dipping salts (choose one):
Everything bagel mix: sea salt + sesame seeds + poppy seeds + dried garlic + dried onion
Smoked paprika salt: sea salt + smoked paprika
Herb salt: sea salt + dried mixed herbs
How to make them perfectly:
Place eggs in a single layer in a saucepan and cover with cold water by at least 3cm
Bring to a boil over medium-high heat
Reduce to a gentle simmer and cook for exactly 10 minutes for fully set yolks
Transfer immediately to a bowl of ice water for at least 5 minutes — this makes peeling dramatically easier and prevents the grey ring from forming around the yolk
Peel and store in the fridge for up to 5 days (or store unpeeled for up to a week and peel fresh each morning for the best texture)
Pack 2 eggs with a tiny container of dipping salt and vegetable sticks
11. Smashed Chickpea and Feta Flatbread
This plant-based protein option is genuinely delicious, surprisingly filling, and introduces children to legumes in a flavour-forward format that does not taste "healthy" in a way they will resist.
Protein per serving: Approximately 18–20g protein
Why children love it: The smashed chickpea spread has a texture similar to hummus but more substantial. The feta adds a salty, creamy element. The flatbread makes it feel like pizza. It is messy and fun to eat.
Ingredients (makes 1 portion):
1 small pitta bread or flatbread (whole grain if possible)
½ cup (80g) chickpeas, drained and rinsed
1 tablespoon extra-virgin olive oil
1 tablespoon lemon juice
¼ teaspoon garlic powder
30g (1oz) feta cheese, crumbled
A few cherry tomatoes, halved
A few cucumber slices
Optional: a handful of baby spinach leaves
Salt and pepper to taste
How to make it:
In a small bowl, combine chickpeas, olive oil, lemon juice, and garlic powder
Use a fork to roughly mash the chickpeas — you want a chunky spread, not smooth hummus. Some whole chickpeas are fine and add texture
Season with salt and pepper and taste — add more lemon if it needs brightness
Spread the smashed chickpeas generously on the flatbread
Scatter crumbled feta over the top
Add cherry tomatoes, cucumber, and spinach if using
Pack in a flat lunchbox — the toppings will hold in place during transport
Make it ahead: The smashed chickpea spread keeps in the fridge for 3 days. Make a larger batch and use it throughout the week.
12. Mini Frittata Squares
A frittata is essentially a big flat omelette baked in a square tin — and the squares pack beautifully in a lunchbox, hold well at room temperature for 4–5 hours, and can be loaded with whatever vegetables and protein your child likes.
Protein per serving (2 squares): Approximately 18–22g protein
Why children love them: They taste like a cross between an omelette and quiche. They are filling and satisfying. The square shape makes them easy to hold. They look impressive.
Ingredients (makes 9 squares in a 20×20cm tin):
6 large eggs
¼ cup milk
½ cup grated cheddar or gruyère cheese
½ cup of fillings (choose from: cooked diced chicken + sweetcorn, ham + peas, roasted sweet potato + spinach, or any combination your child enjoys)
¼ teaspoon salt
Pinch of black pepper
1 tablespoon olive oil for the tin
How to make them:
Preheat oven to 180°C (350°F / Gas mark 4)
Grease a 20×20cm baking tin well with olive oil (or use a silicone tin which requires no greasing)
Whisk eggs and milk together until smooth
Stir in cheese, fillings, salt, and pepper
Pour into the prepared tin
Bake for 20–25 minutes until set all the way through — the centre should not wobble when you gently shake the tin
Allow to cool completely before cutting into 9 equal squares
Store in a sealed container in the fridge for up to 4 days
Lunchbox tip: Pack 2 squares with a side of cherry tomatoes and a small piece of fruit. The frittata squares are filling enough that children do not need a large side.
13. Quesadilla With Black Beans and Cheese
Quesadillas are one of the most popular foods with children — and making them with black beans adds significant protein and fibre alongside the cheese, transforming a simple snack into a genuinely protein-rich lunch.
Protein per serving: Approximately 20–22g protein
Why children love them: They taste amazing. They are familiar and non-threatening to even picky eaters. The melted cheese is deeply satisfying. They can be eaten at room temperature and still taste good.
Ingredients (makes 1 quesadilla):
1 large flour or corn tortilla
¼ cup canned black beans, drained and rinsed
½ cup grated cheddar or Monterey Jack cheese
2 tablespoons sweetcorn
Optional: 2 tablespoons salsa (mild, for dipping alongside)
Optional: 1 tablespoon of finely diced red pepper
How to make it:
Heat a non-stick frying pan over medium heat — no oil needed
Lay the tortilla flat in the pan
Spread black beans evenly over one half of the tortilla, pressing them slightly so they do not roll off
Scatter sweetcorn and diced pepper over the beans
Cover the entire surface with grated cheese
Fold the empty half of the tortilla over the filled half to create a half-moon shape
Cook for 2–3 minutes until the bottom is golden-brown. Carefully flip with a spatula and cook for another 2 minutes until the second side is golden and the cheese is fully melted
Remove from heat and allow to cool completely before slicing into 3 triangles and packing — this is important, as hot quesadillas in a sealed lunchbox create steam that makes them soggy
Lunchbox tip: These are best eaten the same day they are made. Pack with a small container of mild salsa or sour cream for dipping.
14. Hummus and Turkey Veggie Cups
This playful format presents the same ingredients as a wrap but in an open cup using baby bell peppers or lettuce cups as the vessel — making it colourful, fun to assemble, and completely different from anything else in the lunchbox.
Protein per serving: Approximately 20–22g protein
Why children love them: The colourful bell pepper cups are fun and edible. Building your own is interactive and playful. The colours are visually exciting. They feel fresh and crunchy.
Ingredients (makes 1 portion — 4 mini cups):
4 mini sweet bell peppers, halved lengthways and seeds removed (or 4 large lettuce cup leaves)
60g (2oz) sliced turkey breast, cut into small pieces
3 tablespoons hummus
4–6 cucumber slices, cut into small pieces
4–6 cherry tomatoes, quartered
Optional: a small sprinkle of feta cheese
How to make them:
Halve the mini bell peppers lengthways and scoop out the seeds — these become the edible cups
Spread a small amount of hummus inside each pepper half
Fill with small pieces of turkey, cucumber, and cherry tomato
Add a small crumble of feta if using
Pack in a flat, shallow lunchbox container — the pepper halves hold their shape well during transport
Lunchbox tip: These hold well for 5–6 hours with an ice pack. The bell pepper cups do not go soggy the way bread does, making this one of the most reliable fresh lunchbox formats available.
15. Salmon and Cream Cheese Bagel
A whole grain bagel with cream cheese and smoked salmon is a genuinely protein-rich, satisfying, adult-feeling lunch that many children enjoy — particularly older children and teenagers who appreciate more sophisticated flavours.
Protein per serving: Approximately 25–28g protein
Why older children and teens love it: It feels grown-up and restaurant-quality. The flavours are sophisticated. It is visually beautiful with the pink salmon against the white cream cheese. It is genuinely filling and satisfying.
Ingredients (makes 1 bagel):
1 whole grain or plain bagel (thin bagels are better for younger children — less bread, better protein ratio)
2 tablespoons cream cheese
50–60g smoked salmon
3–4 thin cucumber slices
A few capers (optional — older children tend to enjoy them)
A squeeze of lemon
Fresh dill if available
A pinch of black pepper
How to make it:
If the bagel is very thick, slice it in half and scoop out a little of the bread from the inside — this gives a better filling-to-bread ratio
Spread cream cheese generously on both cut sides
Layer cucumber slices on the bottom half
Lay smoked salmon over the cucumber
Add capers, a few pieces of dill, a squeeze of lemon, and black pepper
Close the bagel and wrap in baking paper — baking paper keeps the bagel from going soggy far better than cling film
Lunchbox tip: Pack the salmon bagel separately wrapped in baking paper and not in a sealed container — a little airflow keeps the bread from going rubbery. Include a small piece of fruit on the side for a complete lunch.
The High-Protein Lunchbox Formula
Once you understand the structure, building any high-protein school lunch becomes simple. Every good high-protein lunchbox has three components:
1. A protein anchor (15–25g protein): Pick one: eggs (6g each, use 2–3), Greek yogurt (17–20g per ¾ cup), cottage cheese (22g per ¾ cup), chicken breast (26g per 3oz), tuna (25g per small can), turkey (18g per 2oz), smoked salmon (16g per 50g), mozzarella + prosciutto (18–20g), edamame (17g per cup), chickpeas or black beans (15g per cup)
2. A carbohydrate for energy (chose whole grain where possible): Whole grain bread, wrap, or tortilla | bagel | whole grain crackers | flatbread | oats (in a parfait) | sweet potato | rice cakes
3. Colour from fruit and vegetables: Cherry tomatoes | cucumber | bell pepper | carrot sticks | berries | apple slices | grapes | mango chunks
If you consistently build lunchboxes from these three components, your child will have adequate protein, stable blood sugar, and genuinely varied, colourful lunches throughout the week.
Practical Tips for School Lunchbox Success
Batch Prep on Sunday
Spend 30–40 minutes on Sunday preparing:
Boil 6–8 eggs (ready all week)
Cook 4–5 chicken breasts (slice and refrigerate — ready for skewers, wraps, or flatbreads)
Make a batch of egg muffins (12 muffins = 4 days of lunches)
Wash and store berries in a clean container
Cut vegetable sticks and store in water in sealed containers — crisp for 3–4 days
With these components ready, weekday morning lunchbox assembly takes 3–5 minutes.
Keep an Ice Pack in the Lunchbox
Protein foods — eggs, yogurt, chicken, salmon, cottage cheese — need to stay below 4°C to remain safe for the full school day. A flat reusable ice pack in the lunchbox maintains temperature for 4–6 hours, keeping all protein components safe and delicious.
Involve Children in Choosing
Children who help choose and assemble their lunch are significantly more likely to eat it. Once a week, let your child pick which protein they want, which vegetables, and which fruit. Over time this builds food literacy and reduces the likelihood of lunches coming home untouched.
Frequently Asked Questions
How much protein does my child actually need at lunch?
A rough guide: children aged 4–8 need approximately 19g of protein per day total, so a lunch providing 8–10g is appropriate. Children aged 9–13 need approximately 34g per day — a lunch providing 12–17g is ideal. Teenagers (14+) need 46–52g per day — a lunch providing 15–25g is appropriate. The recipes in this guide provide 12–28g per serving, making them suitable for children from age 5 through the teenage years.
What about nut-free school policies?
Many schools have nut-free policies, which means almond butter, peanut butter, and cashew butter are off-limits. The nut-free alternatives that provide similar protein and fat: sunflower seed butter (SunButter), pumpkin seed butter, tahini (sesame paste), cream cheese, hummus, and any of the animal protein options. Almost all recipes in this guide can be made nut-free by substituting or simply omitting any nut-based ingredient.
My child is vegetarian — which recipes work?
The vegetarian options in this guide are excellent: egg muffins, Greek yogurt parfait, cottage cheese and pineapple, edamame and cheese, smashed chickpea and feta flatbread, mini frittata squares, quesadilla with black beans, hummus and veggie cups, and the peanut butter banana roll (if not nut-free). These provide 12–25g of protein per serving and cover the full range of flavour profiles and formats.
My child always comes home with an untouched lunchbox. What can I do?
This is usually about format, not flavour. Research shows children are more likely to eat food that: looks colourful and visually interesting, is in small, manageable pieces rather than one large item, involves some element of interaction (dipping, building, assembling), and is familiar enough not to feel threatening. Start by identifying one food from this guide that your child already likes — even if it is just the cheese or the peanut butter — and build the lunch format around that familiar element while gradually introducing new components.
References and Further Reading
Leidy HJ et al. — American Journal of Clinical Nutrition (2013) — Beneficial effects of a higher-protein breakfast on the appetitive, hormonal, and neural signals controlling energy intake regulation in overweight/obese, "breakfast-skipping," late-adolescent girls Research confirming that higher-protein meals significantly improve satiety hormone levels and reduce appetite in adolescents compared to normal-protein or no-breakfast conditions — establishing the scientific basis for protein-anchored school lunches.
Galgani JE and Ravussin E — Obesity Reviews (2008) — Energy metabolism, fuel selection and body weight regulation Review of macronutrient-specific metabolic effects — confirming that protein has the highest thermic effect of food and the strongest satiety signalling per calorie of any macronutrient.
Rampersaud GC et al. — Journal of the American Dietetic Association (2005) — Breakfast habits, nutritional status, body weight, and academic performance in children and adolescents Research establishing the relationship between adequate protein and nutrient intake at daytime meals and academic performance in school-age children — confirming the cognitive benefit of nutritious midday eating.
Baum JI et al. — Journal of Nutrition (2016) — Protein consumption and the elderly: what is the optimal level of intake? Foundational protein science establishing essential amino acid requirements across age groups — the basis for age-specific protein recommendations referenced throughout this guide.
About the Author
I'm Judith, a wellness enthusiast and Applied Bio Sciences and Biotechnology graduate behind BiteBrightly. With a deep-rooted belief in the healing power of food, my nutrition journey began with a personal transformation—I improved my eyesight through targeted dietary changes. This life-changing experience sparked my mission to empower others by sharing evidence-based insights into food as medicine.
Drawing on my scientific background, personal experience, and ongoing research into nutrition and health, I focus on breaking down complex health topics into clear, practical, and actionable guidance. My approach combines scientific credibility with real-world application, making evidence-based nutrition accessible to everyone.
Follow me on Pinterest for daily health tips, recipes, and wellness inspiration.
Important Notice: The information in this article is for educational purposes only and is not intended as medical or nutritional advice for specific health conditions. Individual nutritional needs vary based on a child's age, size, activity level, and health status. Children with food allergies, intolerances, or specific medical dietary requirements should have their meals planned in consultation with a qualified healthcare provider or registered dietitian. Always check your school's specific allergy policies before including any nut-based products in your child's lunchbox. These statements have not been evaluated by the FDA.
Connect
Join our newsletter for fresh health tips
© 2026. All rights reserved.